
The Idea
Most developer blogs are basically built around articles. That works fine, but pretty quickly I realized I wanted to put more stuff on the site than just text and screenshots.
For example, if I’m writing about shaders, it feels a bit pointless to only show a screenshot of a graph. I’d rather put the actual graph there and let people open it, move things around, or use the same example somewhere else on the site. The same thing applies to smaller technical experiments.
I didn’t want to rebuild the same demo every time I mentioned it in another article.
Projects are a bit different too. Some of them need screenshots, notes about implementation, random progress updates, links to related articles, maybe interactive examples later on. Trying to squeeze all of that into a normal blog post structure felt awkward. So at some point the site stopped being “a blog with a few extra pages” and became more of a small developer platform.
Right now it has a few main parts:
- Tutorials
- Projects
- Devlog
- Interactive tools
- Technical examples that can be reused in different places
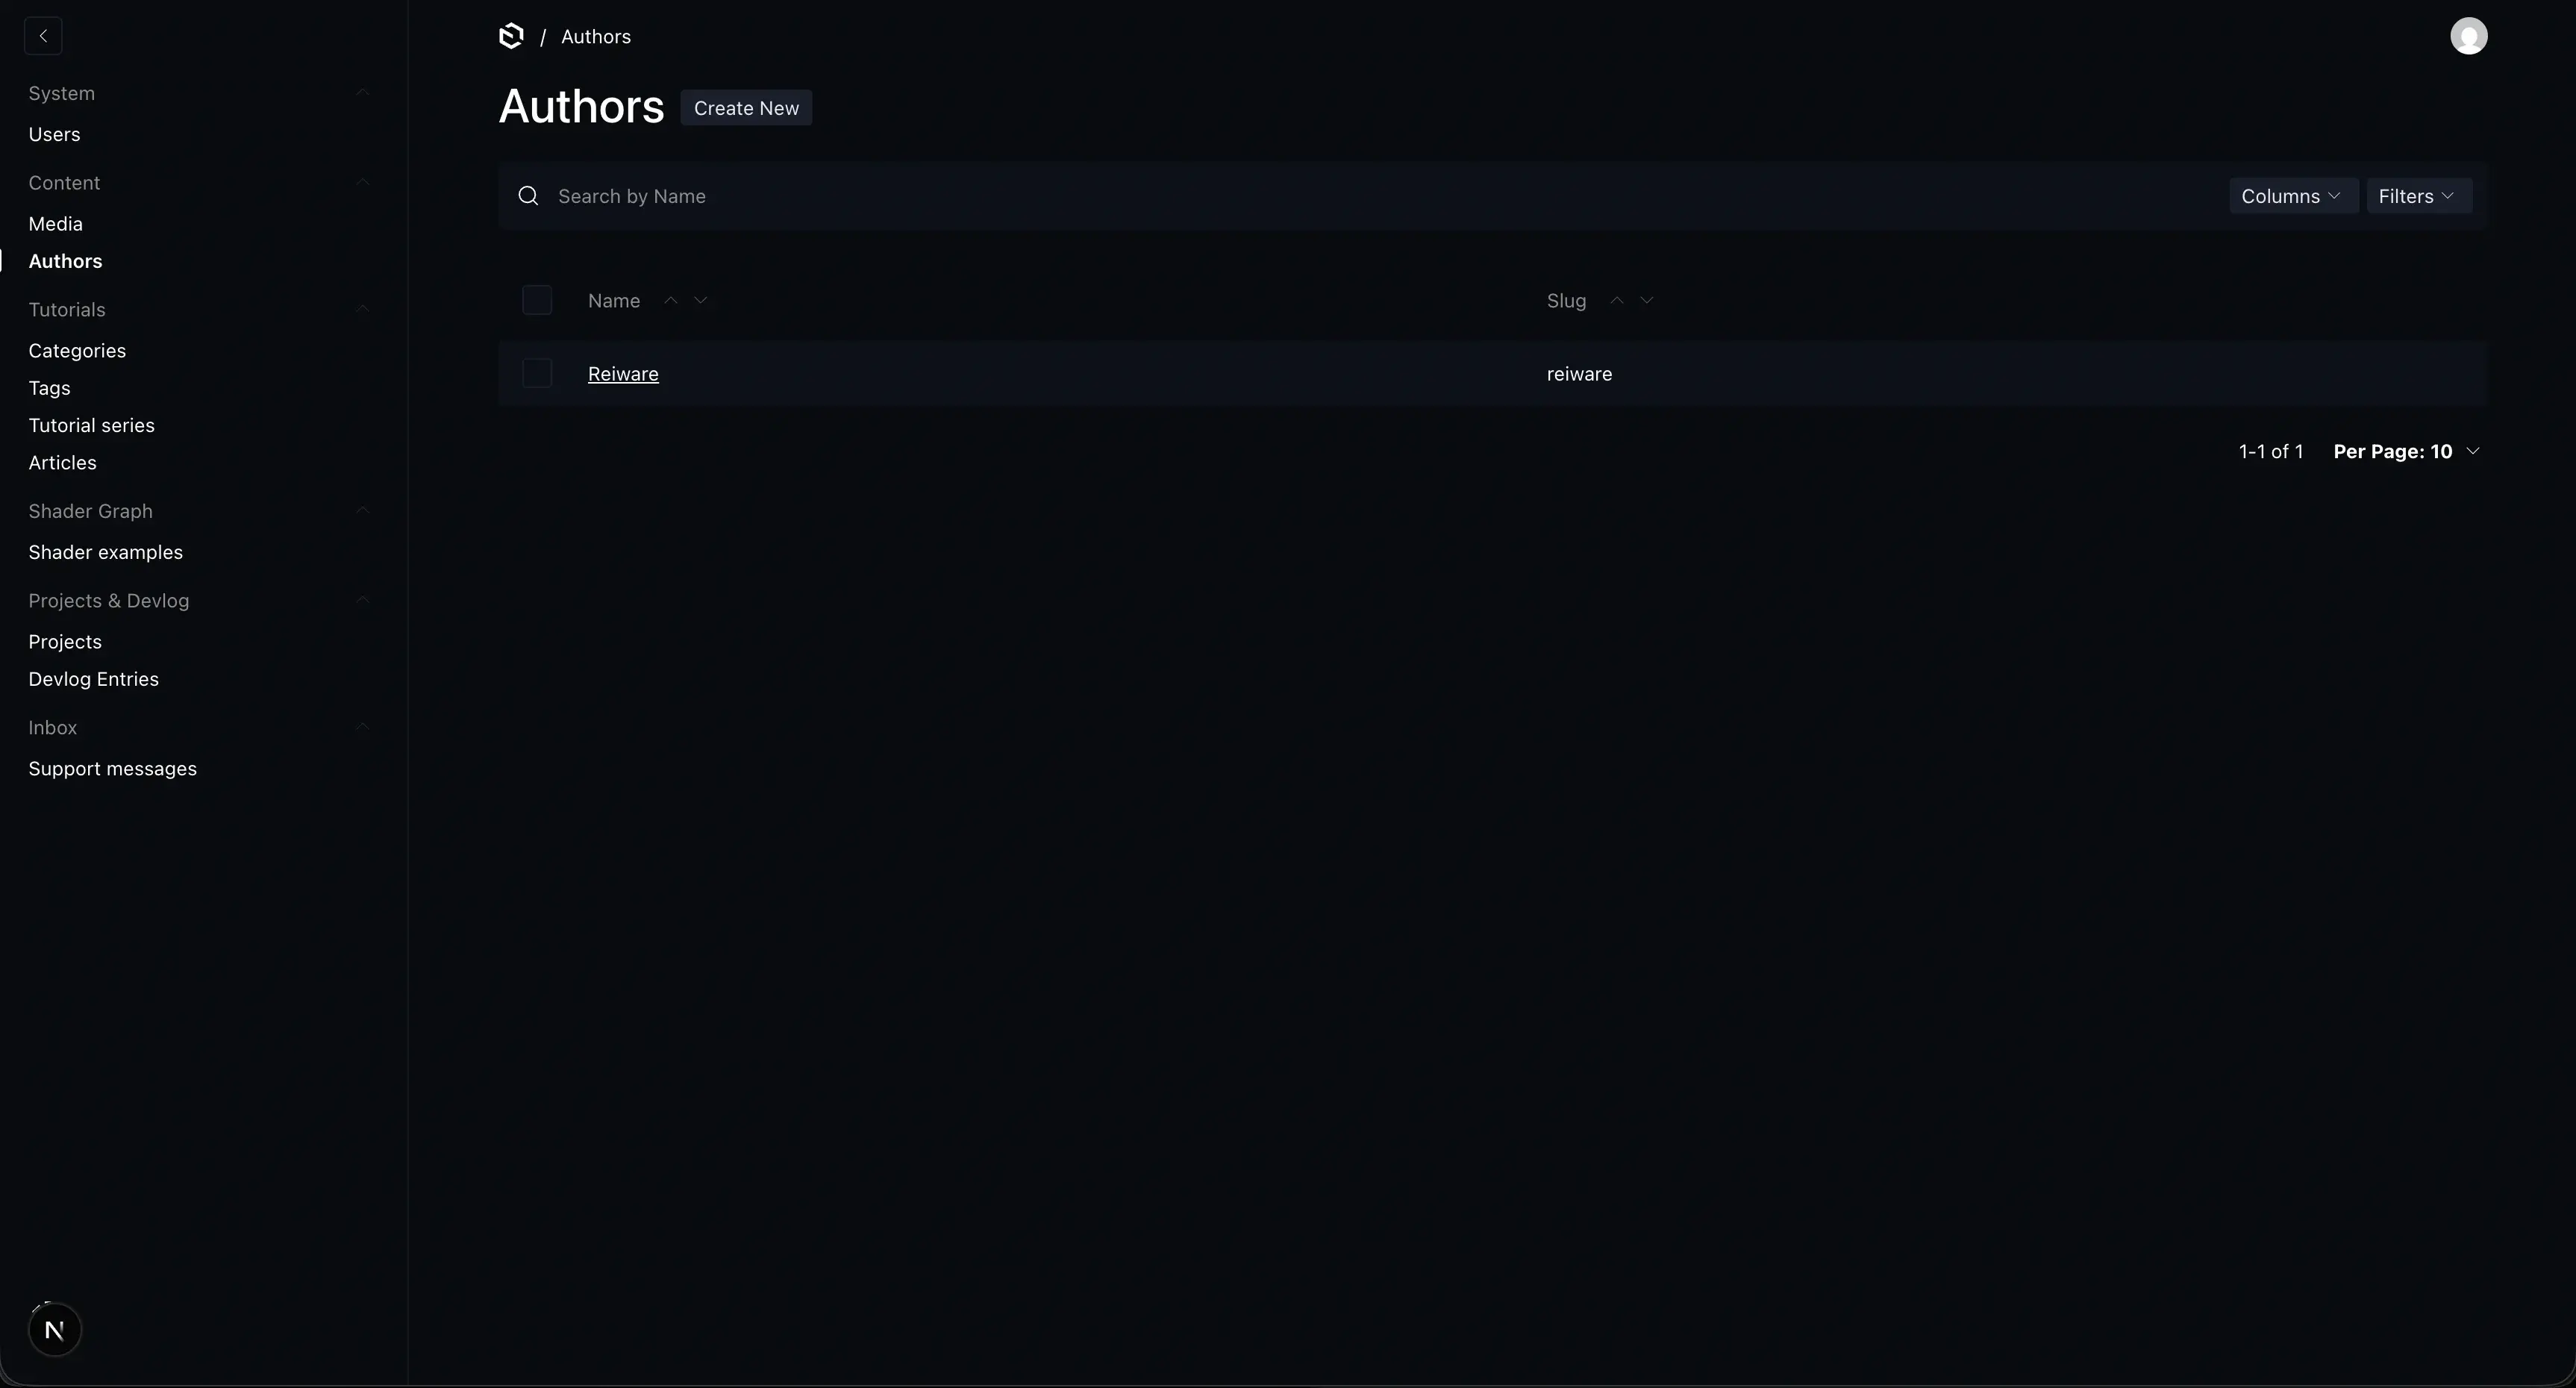
Building the Content System
Tutorials still have the usual stuff - categories, tags, difficulty, reading time, publication dates, series, SEO fields and so on. But the editor isn’t limited to normal rich text.
I added custom blocks for things I know I’ll actually use, like code, callouts and Shader Graph examples. There will probably be more of these later as I run into things that don’t fit nicely into regular article content.
Shader examples are also stored separately from the articles themselves.
That part was important to me because one shader can show up inside a tutorial, then be opened in the Shader Graph tool, and later maybe appear in another article or project page without having three slightly different copies of the same data floating around. It makes the whole system a little more complicated than a normal blog, but it also gives me much more room to experiment with the site later.
A structured content layer
Payload stores tutorials, projects, devlogs, media and reusable technical examples as structured content, so the frontend can present the same material in different contexts without copying it.
A home for practical work
Long-form guides with examples you can read, run, and reuse.
Ongoing work with context, screenshots, stack, and status.
Short notes about decisions, experiments, and progress.
Browser-based tools that connect directly to the written work.
Interactive Content
Some things are hard to explain with screenshots alone.
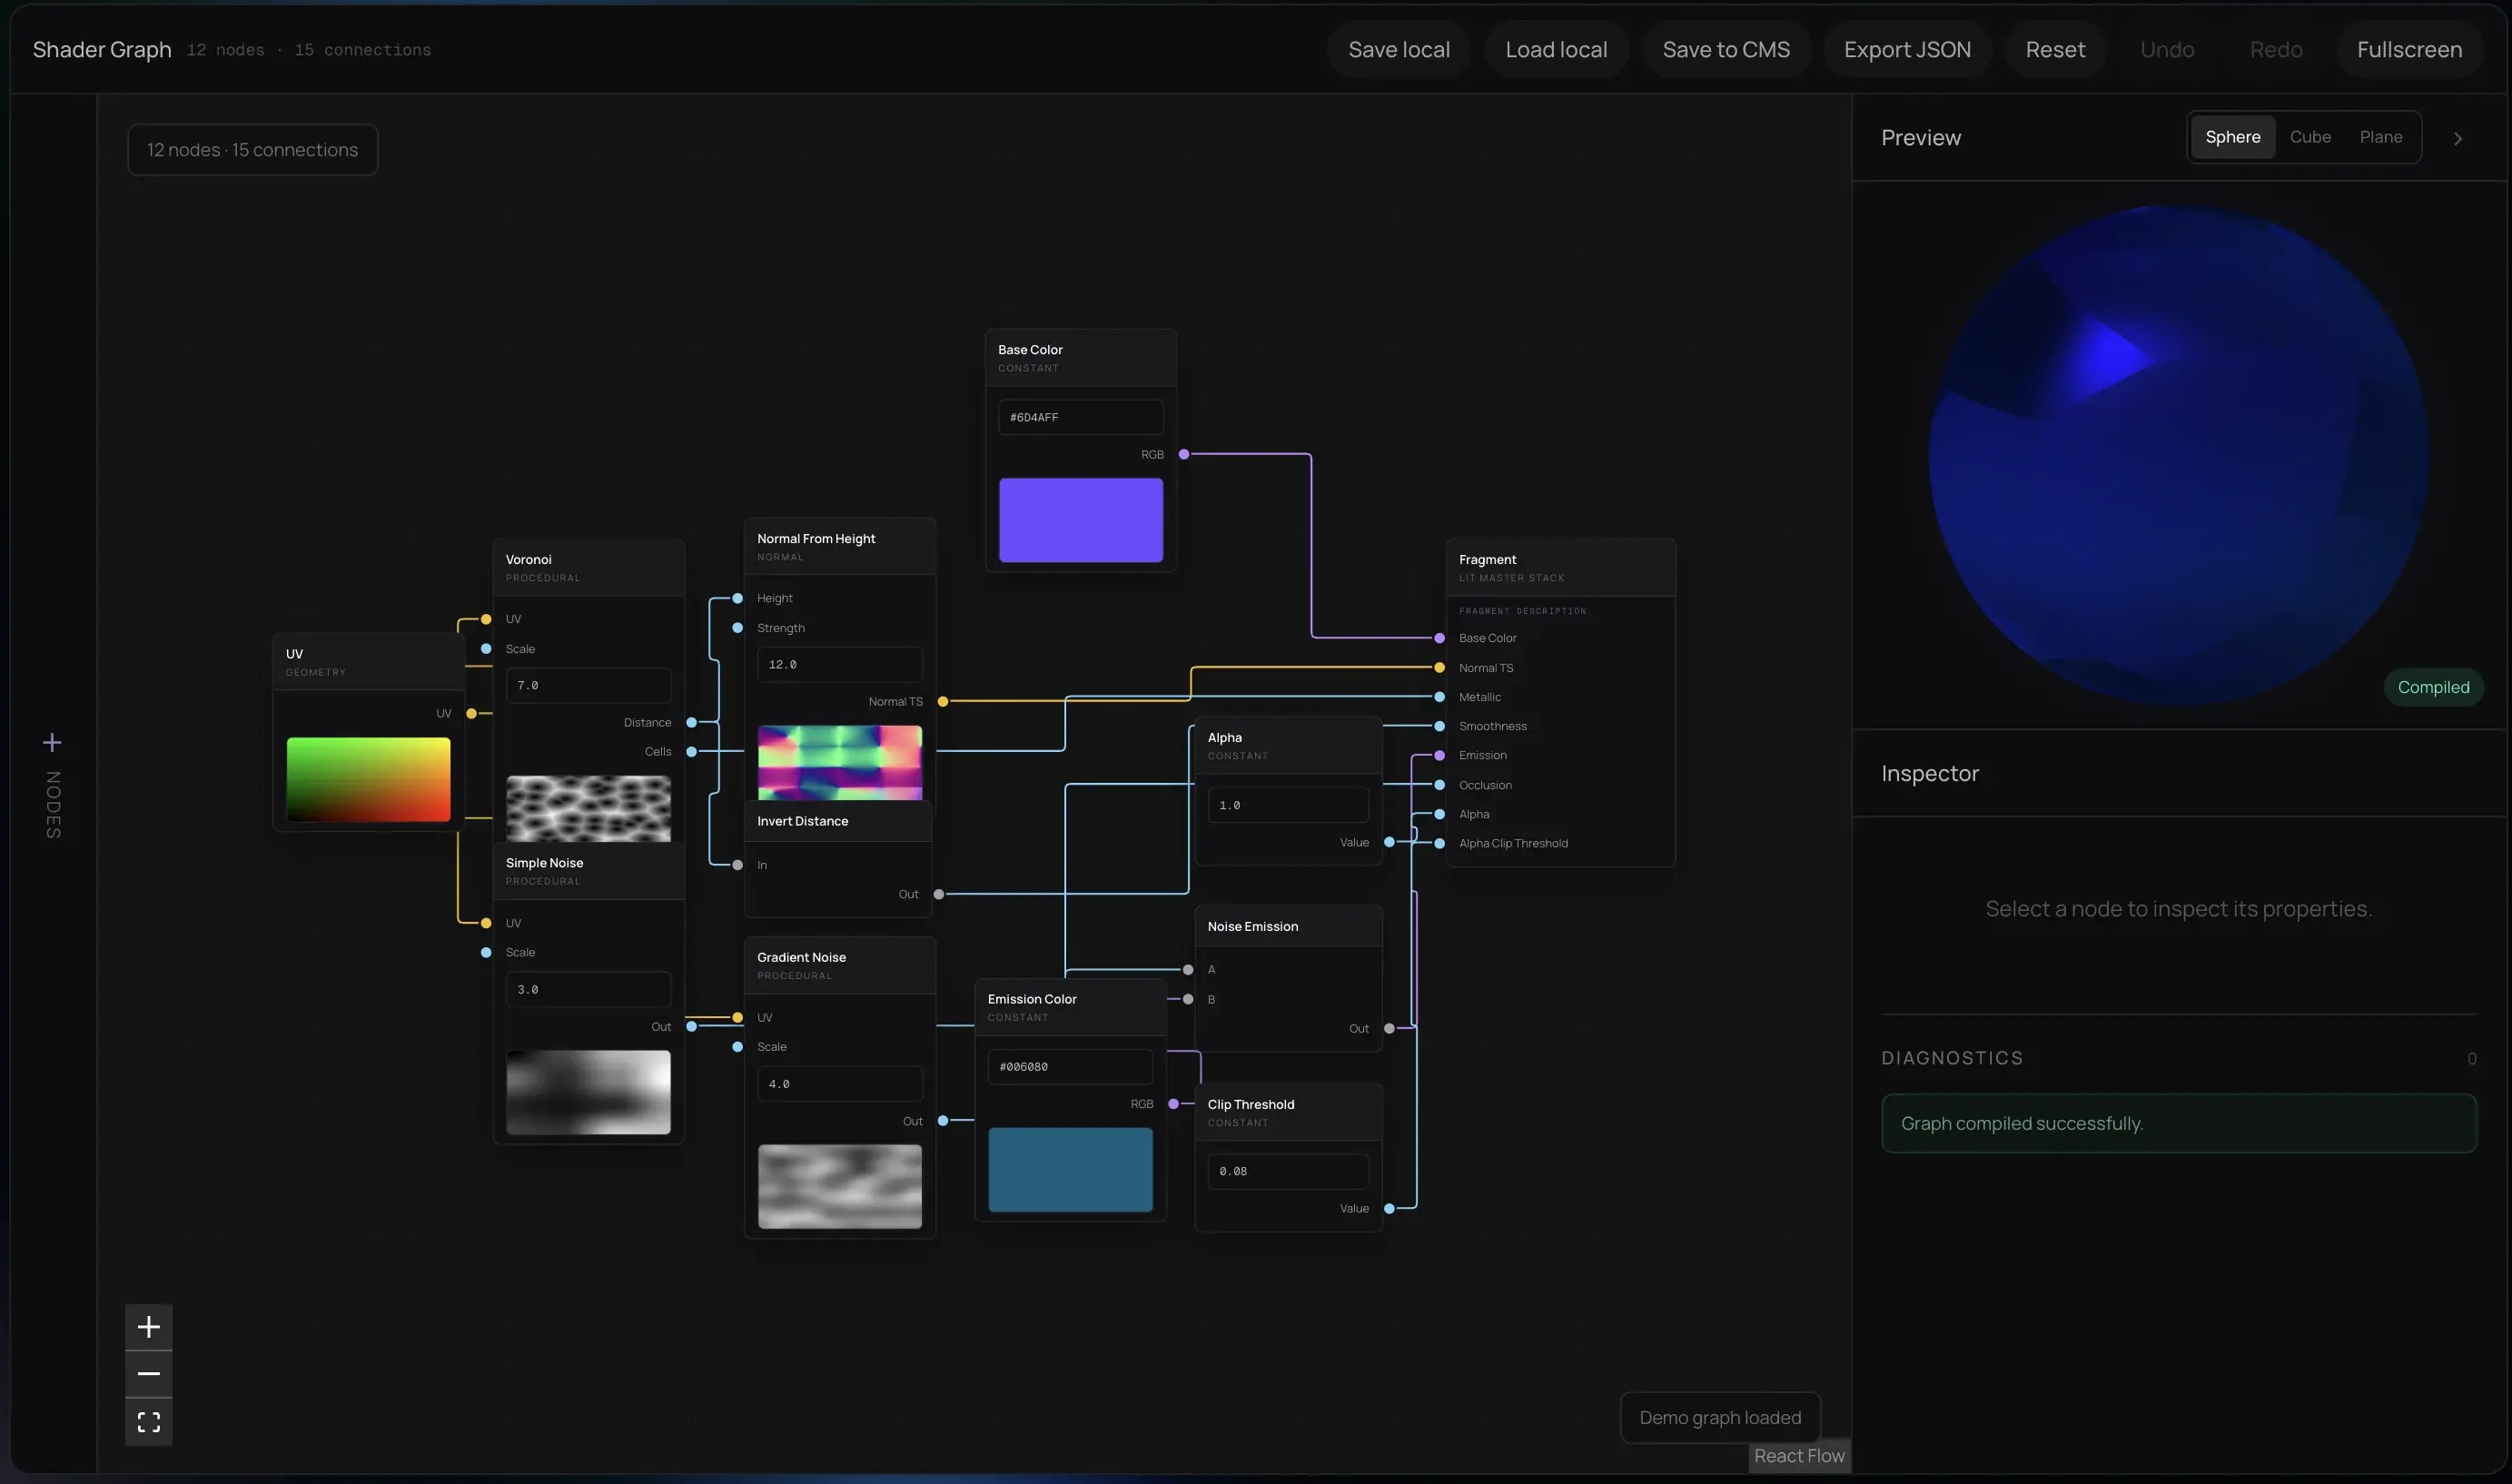
Instead of showing only screenshots of a node graph, tutorials can embed an actual graph directly inside the article.
Readers can inspect it and then open an editable copy in the browser-based Shader Graph tool.
The editor currently supports:
- node connections and editable parameters
- realtime preview
- saving examples locally or through the CMS
- JSON import/export
- undo/redo
This lets an article move from:
“Here is what the graph looks like.”
to:
“Here is the graph. Open it and experiment with it yourself.”
From explanation to experimentation
Shader Graph examples can live inside a tutorial, open as editable copies in the browser, and be reused elsewhere. The graph is stored once; the article is where readers discover it.
Design Direction
I wanted the site to feel technical, but not like a documentation page. Most developer tools are built around dense interfaces, while most editorial websites avoid technical complexity. I wanted something somewhere in between.
Since some articles will get quite long, readability became one of the things I cared about early on.
Tutorial pages use a three-column layout: navigation on the left, the article in the center, and additional information like tags, difficulty, reading time, and related projects on the side.
On smaller screens these sections don't disappear - they just become part of the reading flow instead.